
 A few folks have asked how we turned the Iz photo on the left into her birthday party's collaborative art mosaic on the right (which I came up with due to Iz's love of picture puzzles, a desire to have a gender-neutral 12th birthday party activity, and my inherited predisposition towards the first adjective in this post's title.)
The answer: by hand, though it didn't take that long, and even though there are likely ready-to-go programs out there that I didn't have the time or patience to uncover.
Here's the how-to. Understand that I slapped this together on the fly; work on a Mac and am disinclined to purchase software (again, see title) and so use the powerful shareware Photoshop substitute GIMP along with Preview, the simple image manipulation program that came with my computer; and that it's been about a decade since I wrote documentation.
How to Make a Collaborative Photo Mosaic
Open GIMP and Preview, and remember to save frequently.
First, turn the photo into a black-and-white coloring page
- Choose a JPG photo with lots of distinct lines and features.
- Open your photo in GIMP
- From the Color menu, choose Desaturate
- From the Filter menu, choose Artistic > Cartoon (to define edges)
- From the Color menu, choose Posterize (to simplify details)
- From the Color menu, choose Brightness - Contrast. The Brightness - Contrast dialog box will appear. Adjust to your liking.
Here's how Iz's photo looked at this point:

Next, make the photo wall-size
- From the Image menu, choose Scale Image. The Scale Image dialog box will appear.
- Locate the X Resolution type-in box. Type in "72." The Resolution will change to 72 in the Y Resolution box as well (if you reduce resolution before scaling, the image file size is non-gargantuan).
- Click the Link icon to the right of the X Resolution and Y Resolution boxes. The Link will "break."
- Locate the Width and Height type-in boxes. Click the unlabeled Units pop-up menu to the right, select Inches.
- Determine the longest side of your image, Width or Height, and type 50 (inches) into the corresponding adjacent type-in box.
- Click the Scale button.
- From the Image menu, choose Configure Grid. The Configure Grid dialog box will appear.
- From the Appearance: Line Style menu, choose Dashed.
- From the Foreground Color color picker pop-up, choose red or another distinct non-grayscale color.
- Find the Spacing area. Click the Link icon under the Spacing type-in boxes. The link will "break."
- Set the unlabeled Spacing > Units pop-up menu to "in" for inches.
- If your photo is in portrait orientation, type "8" into the Spacing > Width type-in box, and "10" for the Height type-in box. If in Landscape, switch the numbers. This way every panel will fit on an 8.5" by 11" piece of printer paper.
- Click the OK button.
- From the View menu, choose Show Grid. The grid will appear on top of your photo.
- From the GIMP Toolbox, choose the Rectangle Select tool.
- Using the Grid as your guide, select the top left-handmost 8 inch by 10 inch panel.
- Hit CTRL-C (GIMP is an X11 program, the Apple key will not work) to copy.
- Select the Preview program (simpler than continuing to use and print from GIMP, IMHO).
- From the File menu, choose New From Clipboard. Your copied panel will appear.
- Save the new image panel as MosaicPanel_1.jpg.
- Print panel via the keystroke combo Apple-P or select File Menu then choose Print.
- Retrieve printed panel. On its back, write the panel number and draw an arrow pointing to its top.
- Work your way through the main image repeating steps 2 - 8, each time selecting a new panel and corresponding numbered file name.
- If you have the time and you aren't doing this at the last possible moment and your babysitter doesn't have the flu and you aren't getting up at 6:30 AM to retrieve your cupcake chef from San Francisco, I'd recommend you tripm the white edges from each panel print for a more cohesive mosaic (or have your participants do the cutting). Not necessary, but it would have looked cleaner.
You will now have a set of 8" x 10" images that look like this:

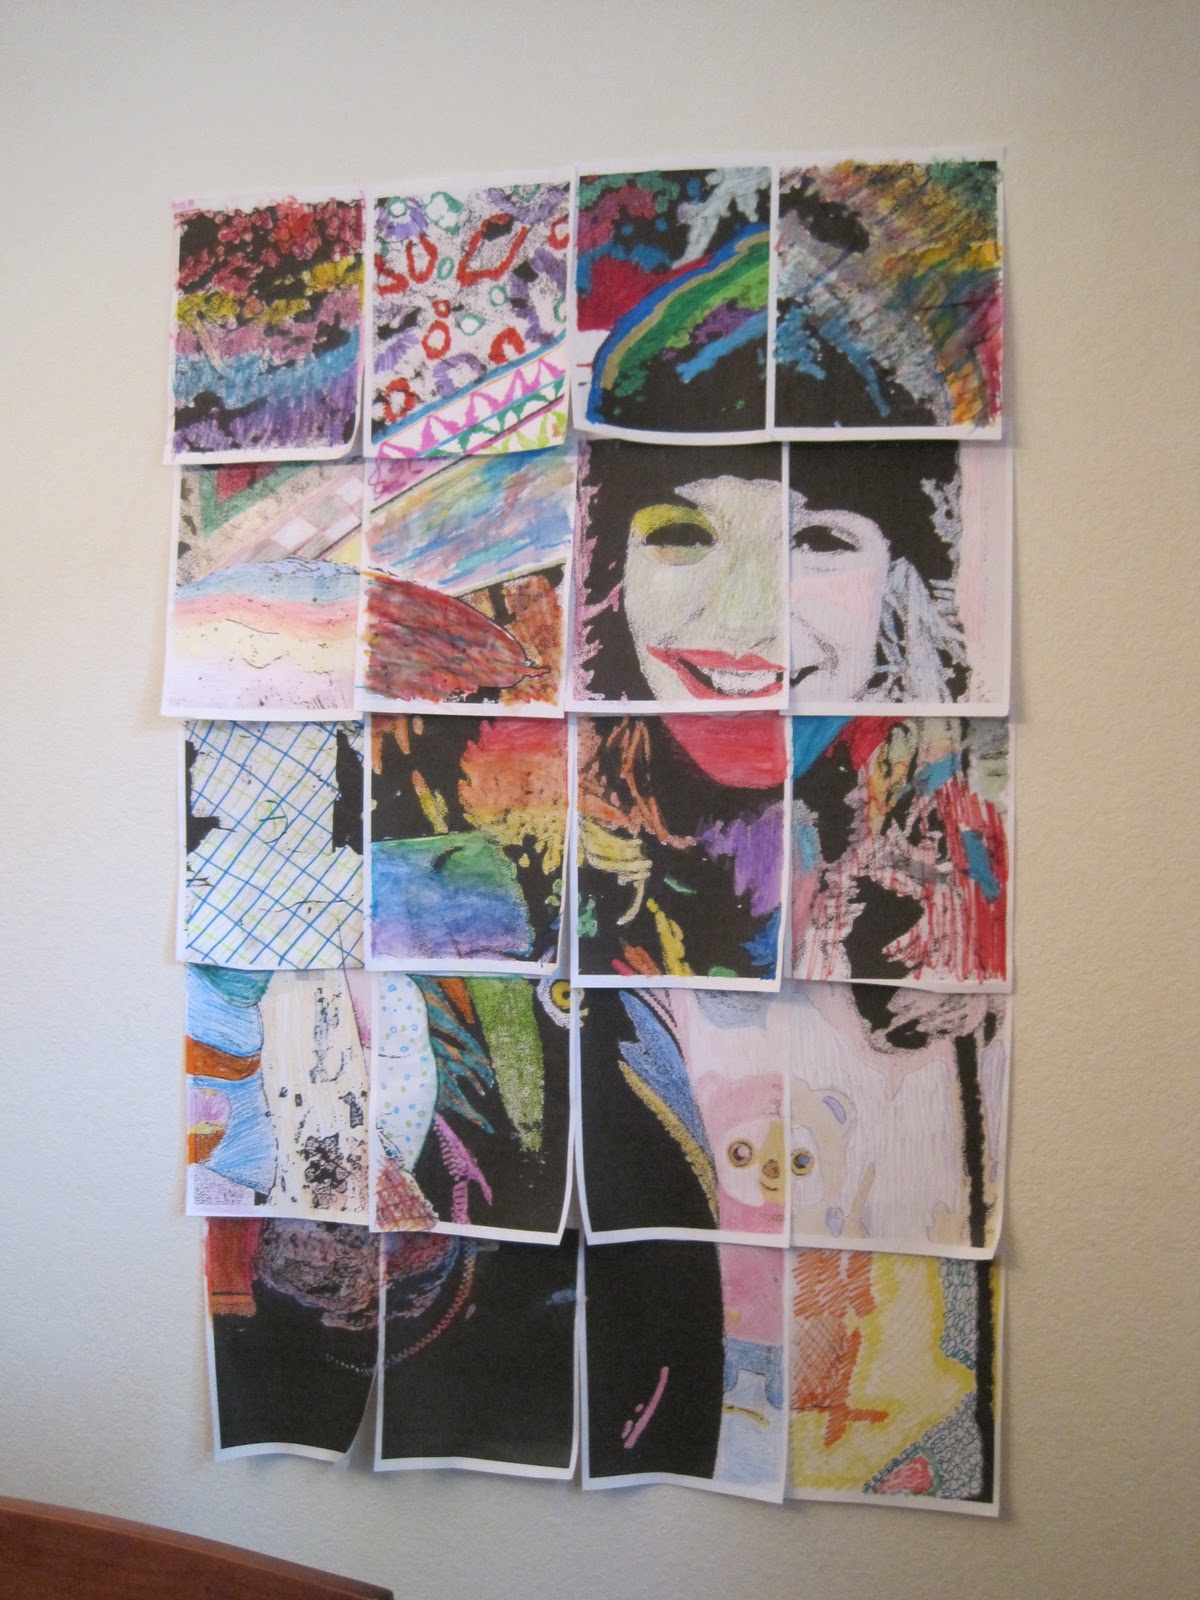
Time to color!

Each child also signed their name on the back, making the mosaic a keepsake for Iz.
After everyone finished, I affixed the panels to the wall with UHU Tac
I think that's it. Any questions? It's not as complicated as this makes it sound, honest.
What a neat idea/activity!
ReplyDeleteAwesome. Thank you. You are so creative to have come up with this. This may be a project at our next party. Or next snowy day!
ReplyDeleteThough I dearly love the result, I cannot even finish reading the instructions. #phew You obviously have more focus.
ReplyDeleteAs a Free Software advocate, I loved that you mention the Gimp, as its a neat tool. Inkscape is its vector-drawing companion ala Adobe Illustrator. But as a Free Software advocate, the term 'Freeware or Shareware' don't convey the core principal of 'Free as in Freedom' vs 'Free as in Cost'[0]. just a pet peeve :). Now back to your regularly schedule party fun!
ReplyDelete[0] http://en.wikipedia.org/wiki/Free_software
Kevix, thanks for the reminder. It's appreciated.
ReplyDelete